68kMLA Classic Interface
This is a version of the 68kMLA forums for viewing on your favorite old mac. Visitors on modern platforms may prefer the main site.
| Click here to select a new forum. | |
| Restoring an Apple Adjustable Keyboard | |
| Posted by: Irinikus on 2025-08-16 06:24:13 I purchased this Adjustable Keyboard to pair with my G3 Beige, which I recently restored: (And as you can see, it's a bit yellowed!) 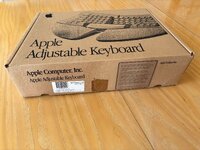 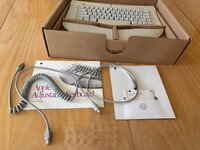 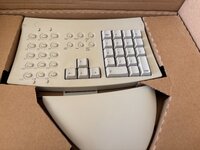 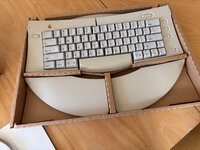 Here's the disassembly process: 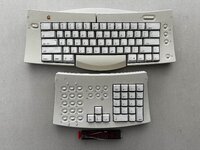 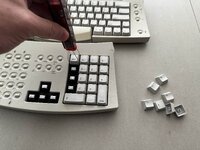 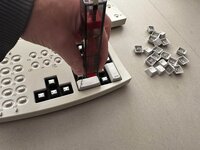 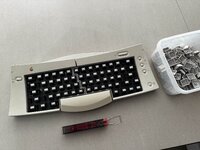 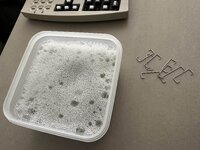 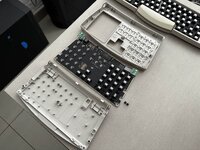 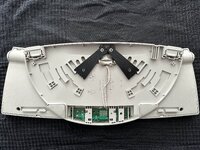 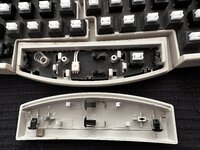 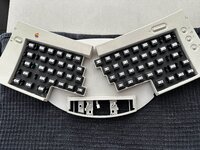 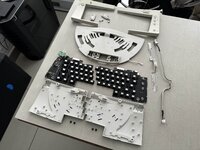 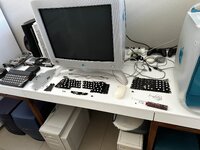 | |
| Posted by: Irinikus on 2025-08-16 06:35:50 Keys cleaned! (Luckily these won’t need retrobright treatment!) 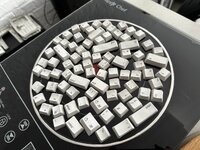 I chose to purchase the Hydrogen peroxide in a 50% concentration from a company which sells laboratory supplies (allowing me to dilute it as required), as I knew that I'd need allot of it for this job! (It works out allot cheaper than purchasing it from a beauty salon!) 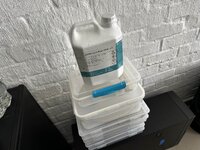 Here's the method I used to redrobright: I placed drinking glasses on the plastics to weigh them down, as the sunlight can pass through the glass. As the UV from the Sunlight breaks the Hydrogen Peroxide down, it produces a huge amount of Oxygen, which would cause the plastics to float if they were not weighed down. 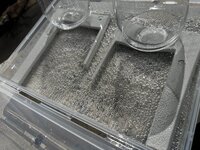 I took this picture while the plastics were drying off after as good rinsing, following the redrobright process. 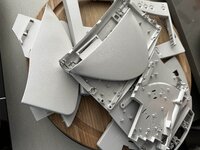 Here the keyboard is reassembled: (This was definitely the most tricky thing I've had to disassemble and reassemble so far!)  Here's a before and after shot, showing the difference: 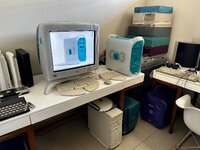  All in all, I'm pretty happy with this result. (But just a warning, these things are pretty tricky to work on) | |
| Posted by: pl212 on 2025-08-16 09:31:18 Great documentation! Did you replace that one capacitor in the main keyboard? I did on mine just because I was in there… | |
Posted by: Irinikus on 2025-08-16 09:55:08Great documentation! Did you replace that one capacitor in the main keyboard? I did on mine just because I was in there…Thanks! 🙂 No I didn't | |
| Posted by: nathall on 2025-08-20 16:06:18 I have one of these that desperately needs a retrobrite but I’ve been afraid to try to take it apart… | |
| 1 |