68kMLA Classic Interface
This is a version of the 68kMLA forums for viewing on your favorite old mac. Visitors on modern platforms may prefer the main site.
| Click here to select a new forum. | |
| Transwarp GS: how to remove WD65C816 CPU from this deep socket? | |
| Posted by: Byrd on 2025-06-09 23:54:42 Hi, I’m souping up an early stock Transwarp GS accelerator to hopeful 12-13Mhz. Part of the process is to upgrade the WD65C816 CPU to a later revision. How do you get it out? I can’t see clips on the top frame, there are two large holes on either corner I thought you maybe insert something to lever it out. Or should it unclip somehow? Thanks | |
| Posted by: NJRoadfan on 2025-06-10 03:58:12 You should be able to lever is out slowly with a pick or hook style tool. At least that is what I did on my card, but I think mine has a more traditional style PLCC socket with slots on the sides for the extractor tools. I would be prepared to replace the whole socket though because the likelihood of 30+ year old plastic cracking is very high. How early is this card? What GAL and ROM revision does it have? | |
| Posted by: Byrd on 2025-06-10 17:57:09 Thanks for the tips am very conscious of not wanting to break parts when upgrading (Reactive micro purchased new cache, GALs, CPU and crystal). The card is marked 2189 presume means made ~ middle 1989 and came with the 32K cache module but oddly a 25Mhz crystal only running at 6.25Mhz. GALS are not marked. This socket doesn't have slots on the sides I suspect it might unclip somewhere but I'll need to be very careful. | |
| Posted by: NJRoadfan on 2025-06-10 18:13:43 6.25Mhz points to an earlier card I think. The GAL set installed is a good indication as well (more rev A parts = earlier card). A better date would be the ROM revision if you had the original 8k cache card. The 32k cache upgrade was offered separate and usually came with v1.8. What GALs is RE shipping? I know the Sanyo 65816 can run almost all "A" GALs without a problem since that CPU has all the bugs worked out. | |
| Posted by: Byrd on 2025-06-10 18:20:15 Didn't look closely enough, the original GALs are: TWGS1A-1 TWGS2A-1 Reactive micro ships upgrade GALs capable of overclocking: 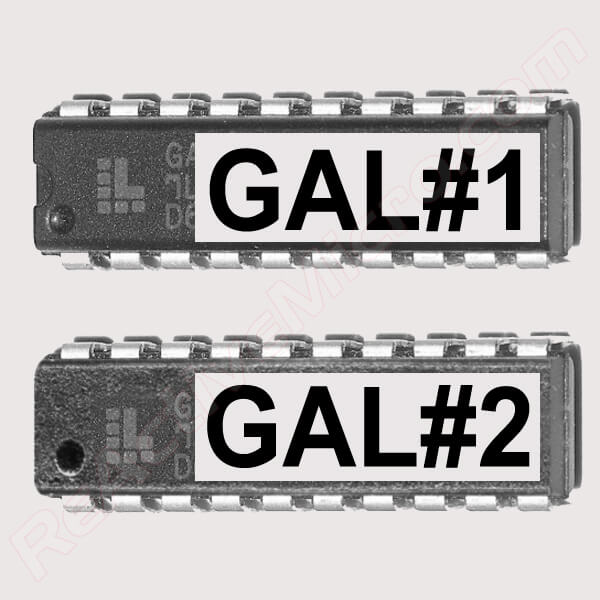
TransWarp GS High Speed Upgrade GAL SetFor those who are looking to push your board as far as possible, this upgrade is for you! The set comes with two High Speed GALs, labeled, and already programed with the latest revisions to allow your
 www.reactivemicro.com
I'm not expecting massive gains noting early revision but hoping for 12 - 13Mhz boost. The 25Mhz crystal is not the original one, larger format with bent legs. | |
| Posted by: NJRoadfan on 2025-06-10 18:51:48 That full size crystal with the bent legs IS the original part shipped with the card. I was able to push my card to 12Mhz. Anything above that was a crap shoot, but I haven't upgraded the power supply yet. | |
| Posted by: Byrd on 2025-06-10 19:25:25 There you go - it looked so sketchy I thought it was non factory! 12mhz I’ll be more than happy with, 6mhz it was pretty good | |
| Posted by: nathall on 2025-06-12 23:32:37 I don’t have any advice on how to remove that CPU successfully, but behold the result of my attempt: 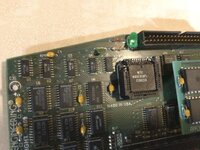 | |
| Posted by: Byrd on 2025-06-12 23:52:08 @nathall I can sense the words that passed your lips when you were here 🙂. Good you got it fixed. Still haven't done the upgrades as been sick. The new cache card is also very difficult to fit and will likely require additional soldering so the machine pins line up (3 x rows). For removal in one foul swoop, I was considering heating up a hot glue stick or two on the CPU, and pulling it up cleanly. | |
Posted by: robin-fo on 2025-06-13 01:45:58For removal in one foul swoop, I was considering heating up a hot glue stick or two on the CPU, and pulling it up cleanly.Excellent idea! You can then easily remove the hot glue using Alcohol/IPA | |
| Posted by: Byrd on 2025-07-26 23:25:41 Hi For future reference I finally worked out to dislodge the 65C816 CPU from this deep socket. The top lid may unclip but is very fragile so don't go there. Hot glue on top to lift it did not work. 1. Lubricate socket with some solvent cleaner/Deoxit/penetrating oil, leave it to sit for a while (due to age, the 1989 installed 65C816 chip once removed had some minor oxidation on all legs which would make it harder to dislodge). 2. Slide a long medium gauge needle in the corner slot, right under the chip coming out the other end. Lift one end using pliers, a corner of the chip should pop up make sure pointy end doesn't poke the PCB! 3. Repeat in 2-3 more corners and the chip by then should be popped out enough to put the needle in top of socket and lever it out safely. Yay, think I'm now ready to finally try out a faster Transwarp! 😀 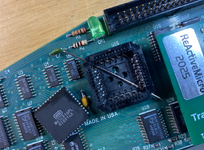 | |
| 1 |