68kMLA Classic Interface
This is a version of the 68kMLA forums for viewing on your favorite old mac. Visitors on modern platforms may prefer the main site.
| Click here to select a new forum. | |
| Macintosh SE/30 M5119 - Restoration | |
Posted by: djc6 on 2024-12-21 15:55:50The Noctua fan already made it here, hoping to get this all going tomorrow. What Noctua fan did you order? I'm looking for one for my SE/30 to make the system quieter. | |
Posted by: GreenBar0n on 2024-12-21 16:57:15What Noctua fan did you order? I'm looking for one for my SE/30 to make the system quieter.I bought the 5V fan in error, and then waited for Amazon to stock the 12V again for over a month, they have plenty now. https://www.amazon.com/dp/B00VXTANZ4 Had to cut the 4-pin end off, and heat shrink the blue and green wires on the SE I just finished. 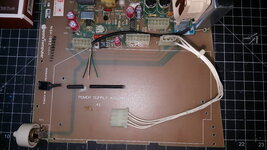 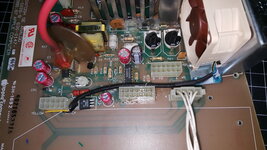 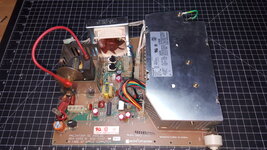 Plan to do this same thing to the SE/30. | |
| Posted by: djc6 on 2024-12-21 21:49:41 This 12V version - the "FLX" version vs the "PWM" you linked to looks like it would require no soldering. It comes with an adapter to plug into hard drive molex connector, and has a passthrough for the hard drive power: https://www.amazon.com/gp/product/B009NQMESS/ref=ppx_yo_dt_b_asin_title_o00_s00?ie=UTF8&psc=1I The PWM version a modern motherboard can adjust the speed and why it has four wires. The FLX version you can adjust the speed manually by swapping different cables that adjust the speed. I found this video showing its installation in an SE/30 - link goes to 6:34 into the video: | |
| Posted by: GreenBar0n on 2024-12-21 22:22:53 Not a fan of the large molex adapter, I like the one I got, great flow and very quiet. Both the 3-pin and 4-pin run at 3000RPM, and cost the same. Thanks. | |
Posted by: GreenBar0n on 2024-12-21 22:32:10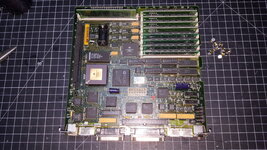 Got the SMD caps removed, and the board cleaned of corrosion. Will freshen up the solder pads tomorrow. Hopefully the Mouser order shows up tomorrow. | |
| Posted by: GreenBar0n on 2024-12-22 12:23:46 Didn't seem like that many parts when I was ordering, but that's every cap in the SE/30. 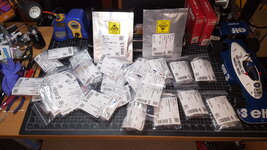 Time to get started. | |
| Posted by: GreenBar0n on 2024-12-24 23:46:43 This SE/30 is coming together a lot faster than my SE restoration. It's always easier the second time around. Got the PSU done, fresh heat grease too. 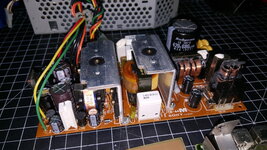 Logic, analog, and PSU finished.  Ordered the yellow tantalum caps, got all black, can live with it. 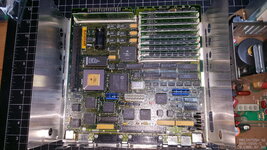 Clear glue on all the same factory points. 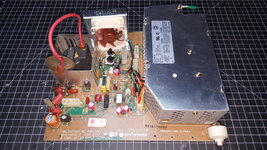 Noctua fan replacement. 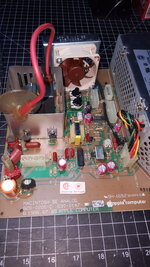 The floppy eject gear seems to be lost in the mail, from less than an hour away from here. The bezel and case are currently bathing in 12% peroxide hair creme and UV light, made sure to remove the bezel badge this time. | |
| Posted by: GreenBar0n on 2024-12-30 01:39:06 Got the eject gear from Betterbit. Recapped the floppy. 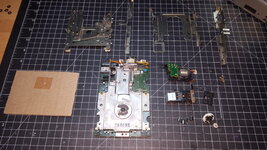 Was watching the JDW video for the 1.44Mb floppy, and he recommends using Dow Corning EM-30L lube for the entire drive. Just ordered some from here in California, hopefully it gets here soon. | |
| Posted by: GreenBar0n on 2024-12-30 18:18:10 I nearly installed (2) caps backwards in the logic board, again. No hot polyester confetti party this time though, didn't power it up backwards. Couldn't believe I did it the first time on the SE logic board (same two caps even C18, C11), C18 popped and stunk the house up for an evening. Guess that wasn't a strong enough reminder, from just last month. Fixed now: the chamfered end is + positive, can't seem to remember this. 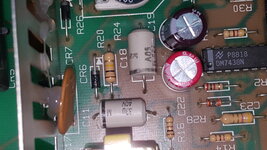 Floppy grease should be here soon. | |
Posted by: croissantking on 2024-12-30 18:40:42I nearly installed (2) caps backwards in the logic board, again. No hot polyester confetti party this time though, didn't power it up backwards.Oh those ceramic caps are really tricky. | |
Posted by: djc6 on 2024-12-31 12:11:52Was watching the JDW video for the 1.44Mb floppy, and he recommends using Dow Corning EM-30L lube for the entire drive. Just ordered some from here in California, hopefully it gets here soon. Where did you order the EM-30L? OOS on Amazon. | |
Posted by: GreenBar0n on 2024-12-31 15:18:17Where did you order the EM-30L? OOS on Amazon.Ebay has a decent selection, went with the Japan Molykote, instead of Dow Corning, got one from CA, as opposed to NJ, was trying to get it quicker. https://www.ebay.com/itm/387715756346 | |
| Posted by: GreenBar0n on 2025-01-03 13:19:40 Got the 1.44 floppy rebuilt. Stock grease and gears. 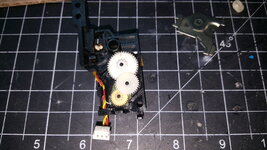 Some mold growing on my cheese gear? 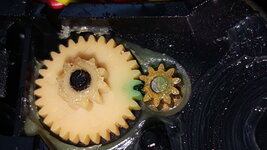 Barely touched the moldy cheese gear with my thumbnail to remove it from the case, and a chunk came off of the small inner gear. 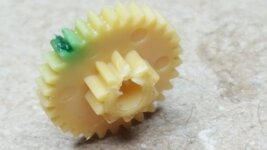 DuPont Molykote from Japan. 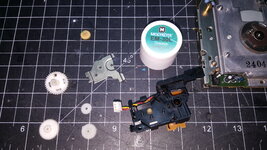 These Betterbit eject gears from ebay are great, excellent quality and the customer service is unbelievable for how cheap these are - fast shipping too! 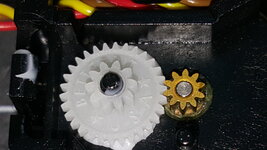 Cleaned and lubed. 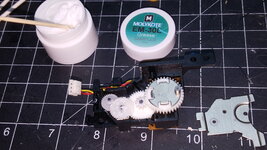 Ready for another 40 years. 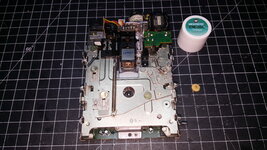 | |
| Posted by: GreenBar0n on 2025-01-03 14:02:42 Everything was going really well, until I plugged it in. Seems I've joined the simasimac club, except I get no chime, just an opening pop/crack as if a sound might begin to play (very brief pop/click), and then only this. 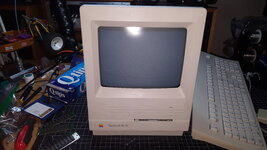 The chains. 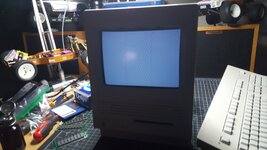 Checked the ROM slot, and found a small piece of plastic in one of the contacts: 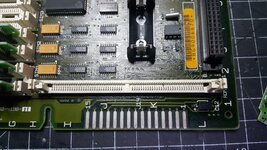 Pulled this little scrap out, and no change at all, still no sound, simasimac. 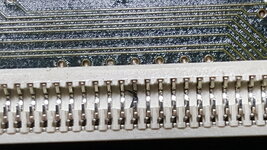 This SE/30 came with two different types of RAM SIMM. Pulled both sets, no change, put the Ti sticks in Bank B, with nothing in Bank A- no change at all. 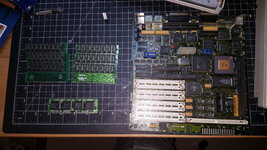 Inspection of the UE8. 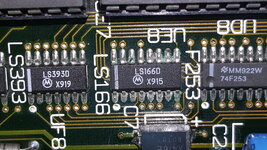 Closer yet.  Going to remove UE8, the LS166D with hot air, and try it in my TL-866 to see if it's bad. Waiting for kapton tape to make a foil shield for the surrounding chips. Might need to remove the Sony sound chips too, one had really bad corrosion. After the UE8 is removed, I'll check all the traces, ROM too. | |
| Posted by: GreenBar0n on 2025-01-04 15:35:27 After watching this video @0:42: That's the exact same simasimac pattern I have. He concludes fairly early on that he should've tried some different RAM to start off with, before going so far in to the repair process. I have 4Mb of tested RAM in my SE, that I'll be trying out in the SE/30 today. Got an extended 24-pin ATX cable, it sits right on top of the axial cap leg, not sure how solid this is, haven't powered it up yet. 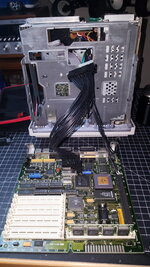 Will also try putting a PRAM battery in, with the SE RAM. Also received the kapton tape, will try everything I can before removing board components, first. | |
| Posted by: GreenBar0n on 2025-01-04 15:50:16 If none of the above works, will be paying special attention to UE8, and in particular this trace that seems to go to the bottom of the LB, there is no via to test on the top side. 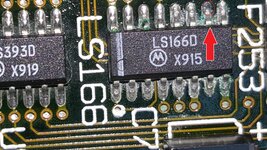 | |
Posted by: GreenBar0n on 2025-01-04 19:39:40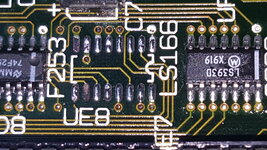 A leg rotted off. 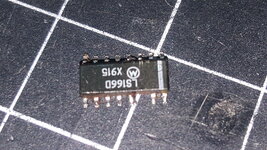 Having a lot of trouble trying to uncover those traces that were blackened. Can't get solder to stick to those two pads. 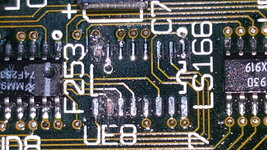 Will order a LS166, and see if I have to use bodge wires, hope not. | |
| Posted by: obsolete on 2025-01-04 19:58:24 Those two pads look like they're gone; at least the bottom one does, for sure. I'm sorry to say I think bodge wires are in your future. | |
| Posted by: GreenBar0n on 2025-01-04 20:08:18 Is 30 AWG Kynar wire sufficient, or what would you recommmend? | |
Posted by: joshc on 2025-01-04 20:22:38Having a lot of trouble trying to uncover those traces that were blackened. Can't get solder to stick to those two pads.Before you give up on those pads, use an X-acto knife or similar to gently scrape it. Use lots of wick and flux to clean it. If there is copper left, apply fresh solder, repeat process. If its totally shot, then yeah you may have to solder a bode wire to the nearest good trace. | |
| < 3 > |