68kMLA Classic Interface
This is a version of the 68kMLA forums for viewing on your favorite old mac. Visitors on modern platforms may prefer the main site.
| Click here to select a new forum. | |
| Macintosh IIci No display | |
Posted by: ExplorerZ on 2023-02-25 13:28:06Surely you didn't break off both sides. The front and back?I guess I did, each side only has about half a millimeter. Should I press down on it with my soldering iron so it slips through? | |
Posted by: ExplorerZ on 2023-02-25 13:31:25Surely you didn't break off both sides. The front and back?(Other message) | |
Posted by: Phipli on 2023-02-25 13:44:30I guess I did, each side only has about half a millimeter.I'm very confused that you don't have anything to grasp on either side of the board, and am almost certain you are misunderstanding me. Melt the solder from the side of the PCB, and push a small wooden skewer into the hole to push the pin out. | |
Posted by: ExplorerZ on 2023-02-25 15:13:56I'm very confused that you don't have anything to grasp on either side of the board, and am almost certain you are misunderstanding me.Oh ok. I just have a soldering mat on my table that I’m using. | |
Posted by: ExplorerZ on 2023-02-25 15:40:19I'm very confused that you don't have anything to grasp on either side of the board, and am almost certain you are misunderstanding me.Worked, but I’m having trouble clearing out the holes so I can put a new one in. | |
Posted by: Phipli on 2023-02-25 15:57:14Worked, but I’m having trouble clearing out the holes so I can put a new one in.Use flux and solder wick, if you still struggle, counterintuitively, re fill it with solder and try again. Don't hold the iron on it for too long or it will scorch. Lift the wick away with the iron and don't let the solder cool with the wick on the board, and if it does, don't tug on the wick or you might damage a pad or trace. Take care. | |
| Posted by: Phipli on 2023-02-25 15:58:37 Clean the flux off when you're done. Don't breathe the fumes. | |
| Posted by: ExplorerZ on 2023-02-26 11:56:11 It’s alive! (Kind of) The replacement and the jumper works. Without the jumper when powered on the screen turns red. With it the screen is only red while pushing the reset button. Going to check traces now. PS: It was the solder sucker that got it all out. | |
Posted by: ExplorerZ on 2023-02-26 11:57:09How are you checking for those, visually or using a multimeter?Noob question. How would I check the traces? And which ones? | |
Posted by: ExplorerZ on 2023-02-27 16:25:26Noob question. How would I check the traces? And which ones?Any help? | |
Posted by: Phipli on 2023-02-27 16:43:45Any help?Take the board out of the computer and study it in good light. Systematically look at each and every area. It can help to take a photo and draw a grid over it, then inspect each grid square and mark it off before moving on. You're looking for damage like chips or scratches or bent pins, or corrosion, which looks like dark patches or mottling, or dull grey solder (instead of shiny). Really bad is green fuzz and black solder. If you find a suspect area, set the multimeter to "continuity" mode (buzzer mode) if it has one, or resistance mode (the lowest setting) if not. If you're really unfamiliar with multimeters, it's probably best to watch a couple of videos. Follow each bad looking trace to its start and end, and carefully, without slipping with the probes, check if there is a continuity by putting a probe at each end where there is metal - on a pin or pad. Do not scratch over the surface of the PCB. Do not slip or press on small pins and bend them. Have a look for videos on YouTube for continuity testing. It will be much easier than me explaining. | |
| Posted by: joshc on 2023-02-27 18:12:29 I've had boards where traces look fine but when tested they are no good. Easiest way is the multimeter on continuity mode. | |
Posted by: ExplorerZ on 2023-02-28 14:41:56Take the board out of the computer and study it in good light. Systematically look at each and every area. It can help to take a photo and draw a grid over it, then inspect each grid square and mark it off before moving on.One black trace, probably corroded. Previous owner put a wire jumper on it though and when tested it works. Tested a few random traces and they were all good. Is there any important traces I should test? Where are they? | |
Posted by: Phipli on 2023-02-28 14:42:32One black trace, probably corroded. Previous owner put a wire jumper on it though and when tested it works. Tested a few random traces and they were all good. Is there any important traces I should test? Where are they?On the PCB 🙂 | |
Posted by: ExplorerZ on 2023-02-28 14:42:50I've had boards where traces look fine but when tested they are no good. Easiest way is the multimeter on continuity mode.Which traces should I test? I tried testing the ones near the reset button but I can find where they end. | |
| Posted by: Phipli on 2023-02-28 14:43:33 More seriously, check near the video port, and check the previous repair isn't shorting to something else. But there aren't really shortcuts sorry. | |
Posted by: ExplorerZ on 2023-02-28 14:44:42More seriously, check near the video port, and check the previous repair isn't shorting to something else. But there aren't really shortcuts sorry.Do you have a image that shows were the traces start and end? It would really help. | |
Posted by: Phipli on 2023-02-28 14:51:36Do you have a image that shows were the traces start and end? It would really help.It's in front of you, its green and rectangular! Repairing logic boards isn't quick. It took me 11 months on and off to fix my 630, although there was quite a lot wrong with it and I ignored it for about 9 months in the middle 😆 You really have to systematically inspect everything that it might be. 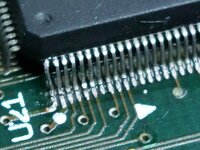 | |
| Posted by: Phipli on 2023-02-28 14:57:43 Re reading your initial posts, it sounds more fundamental than video. Has it ever booted (since you'vehad it)? Or even chimed? | |
Posted by: ExplorerZ on 2023-02-28 15:03:19Re reading your initial posts, it sounds more fundamental than video. Has it ever booted (since you'vehad it)? Or even chimed?Since I have had it, it has powered on, but not chimed. I know the last owner is somewhere on here, so I can ask him. I bought it for parts/repair. | |
| < 3 > |